
Make and do
Make A Nest Box
For small birds, such as Blue Tits, Coal Tits, Great Tits, Sparrows, Wrens, and if you are very lucky, Nuthatch, you can make a nest box, or win one in our competition. Put it up in late Autumn/early Winter to allow birds to get used to it and become inquisitive. Your nest box(s) should be mounted securely, at least 3m above the ground, in a place where you are not accessing every day, and where predators, such as Squirrels and Rats cannot access. Your nest box should be located anywhere from the North West direction, heading clockwise to due East. It is important not to put your nest box where it will be subjected to full sunlight for the majority of the day.
DO NOT ATTEMPT TO MAKE THIS NEST BOX IF YOU DO NOT POSSESS THE TRAINING AND SKILLS TO USE THE TOOLS LISTED.
Wrens, Blue Tits, Coal Tits, Great Tits, Sparrows, Marsh Tits - and rarely Nuthatch. Hole size decides who can move in.
3m+ off the ground, NW-clockwise-to-East facing, out of full sun and away from squirrels and rats.
Late autumn or early winter. Birds need time to get curious before nesting season.
Tools you'll need
- Pencil, ruler, square and a sliding bevel
- Panel saw
- Mitre saw (150mm+ cutting height) for the 20° bevels
- Sharp knife, chisel or a multi-tool with a saw blade (for the climbing grooves)
- Four 30cm clamps
- Power drill - rechargeable battery type is best
- 25mm, 29mm or 32mm hole saw (matched to your protector plate)
- 3.5mm, 5mm and 8mm HSS drill bits
- Countersink bit
- Smoothing plane, sanding block or electric sander
- No.2 Pozi-drive screwdriver or attachment - never a screwdriver bit in a mains-powered drill!
Materials
- 19mm Accoya timber - 150mm x 1,500mm planed straight-edge board (Ryedale Joinery)
- Approximately 30 screws, 5 x 40mm, stainless steel (avoid Screwfix - they break)
- Hole protector plate matched to your hole saw (25 / 29 / 32mm)
- Two heavy-duty twin-screw picture-frame hangers
- A handful of clean wood shavings and dried grass for starter furnishings
Don't have the tools? You can also win a ready-made nest box in our competition.
Step by step
- 1
Pick a spot before you build
Mount the finished box at least 3m above the ground, somewhere you don't visit every day, and out of reach of squirrels and rats. Face it anywhere between North-West and due East (clockwise) so it doesn't bake in full sun. Put it up in late autumn or early winter so birds have time to get used to it.
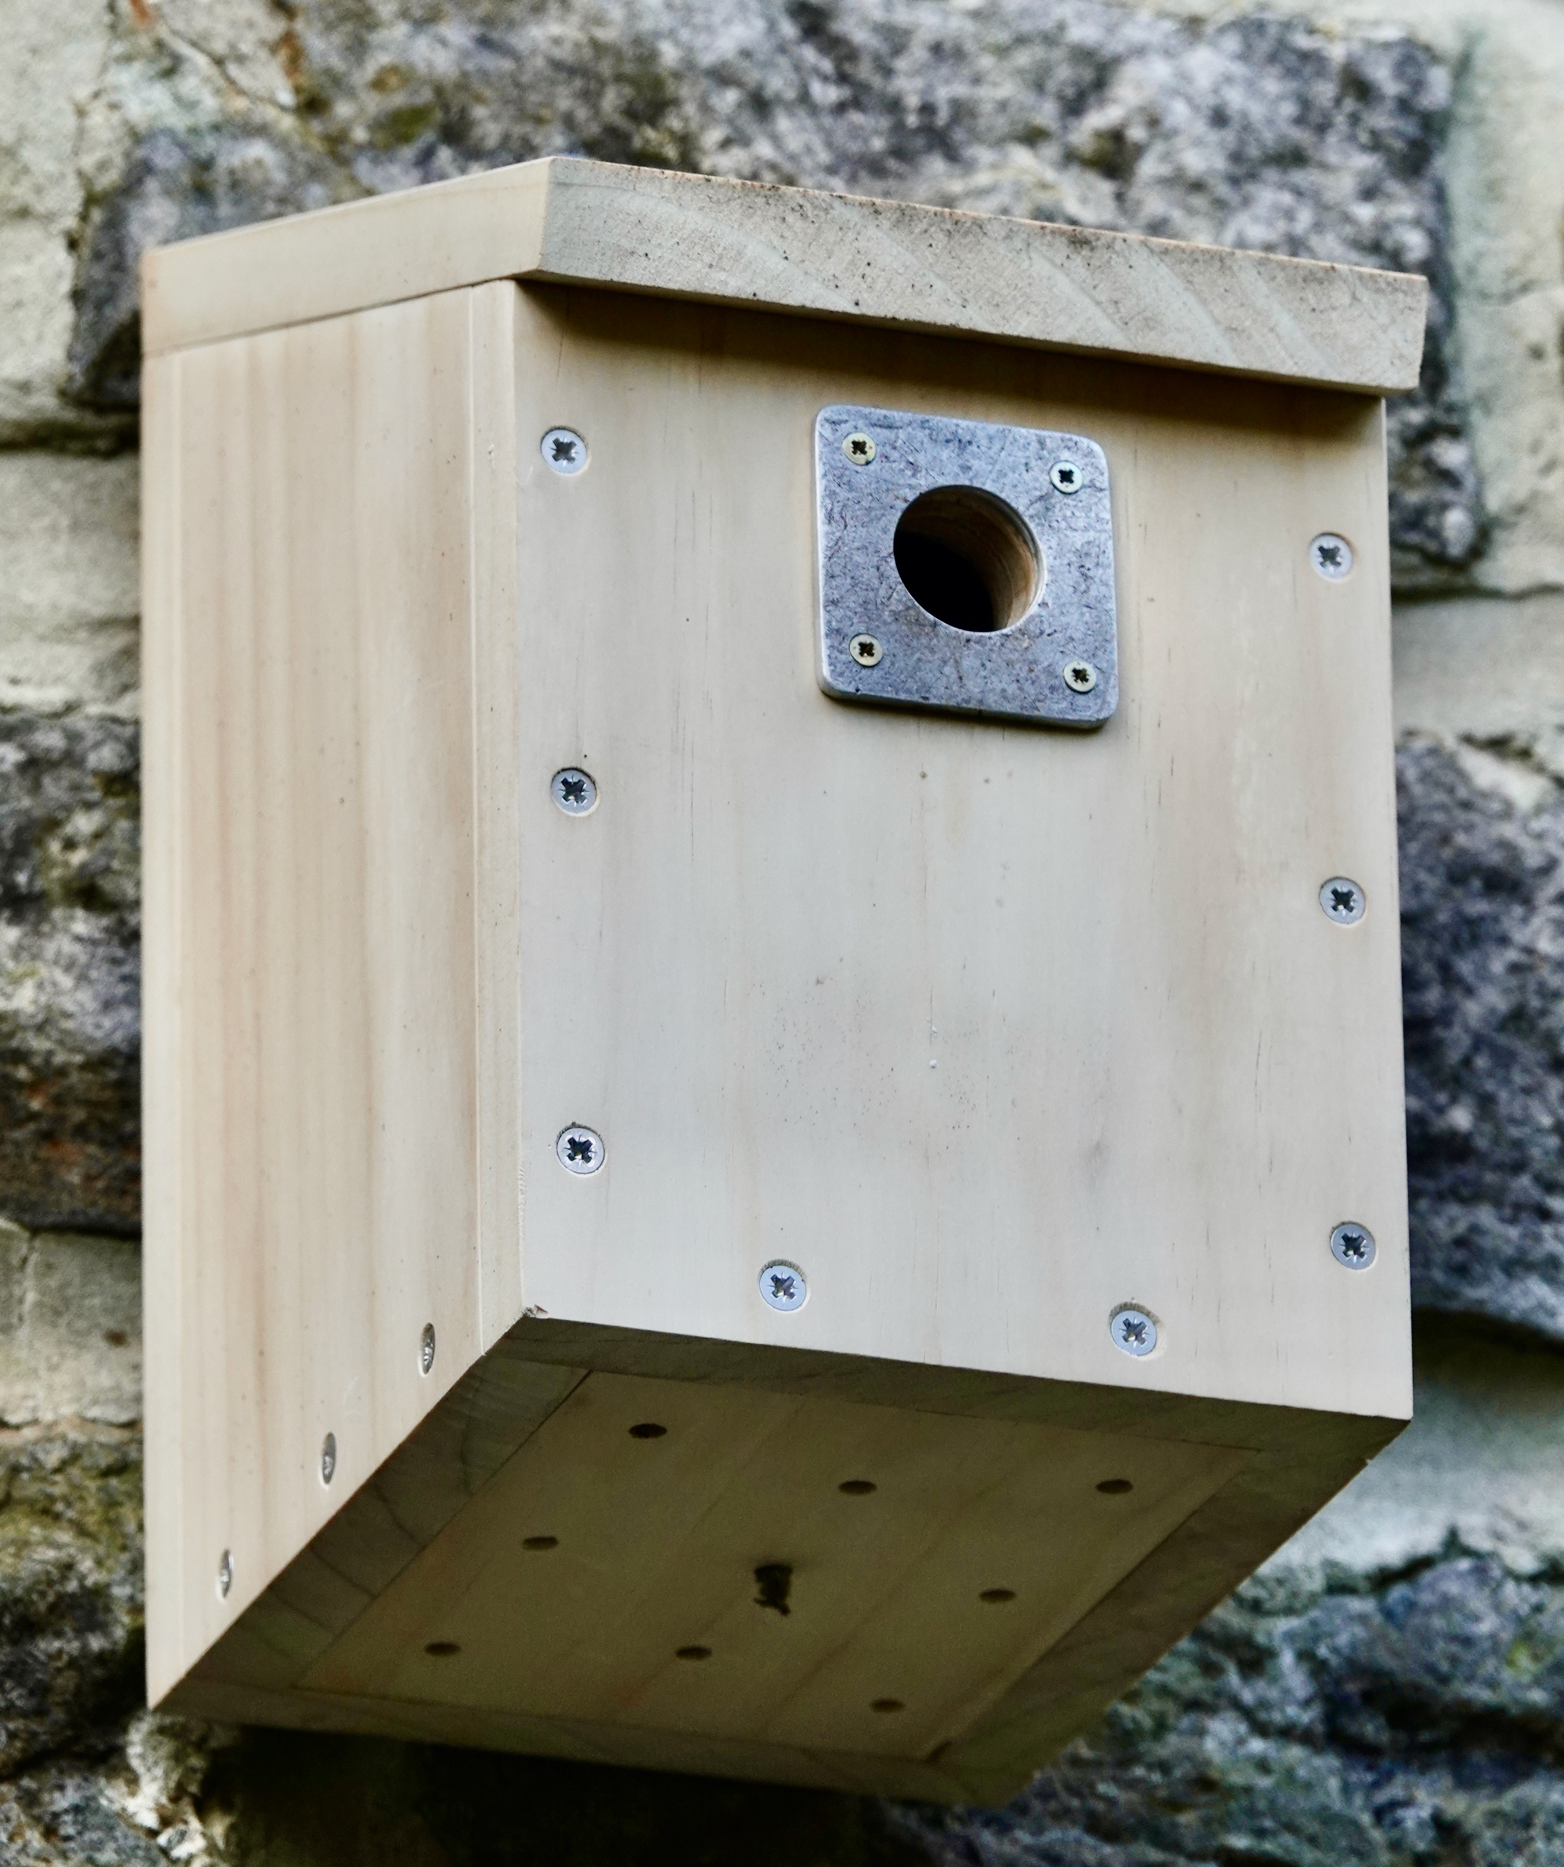
The finished box - 25mm hole suits Wrens, Blue Tits, Coal Tits or Marsh Tits. First come, first served. - 2
Choose your timber
We use 19mm Accoya from Ryedale Joinery - it's guaranteed 50 years untreated. Never paint or treat a nest box. Buy one 150mm x 1,500mm planed straight-edge board (the extra 300mm gives you a margin for cutting errors).
- 3
Mark and cut the parts
Cut from left to right: two sides (240mm and 185mm tall to make the roof slope), then back (245mm), roof (230mm), front (185mm), and finally the floor (112mm). Allow 4mm per saw cut. Mark each piece only after the previous cut, so the kerf doesn't push your measurements out.
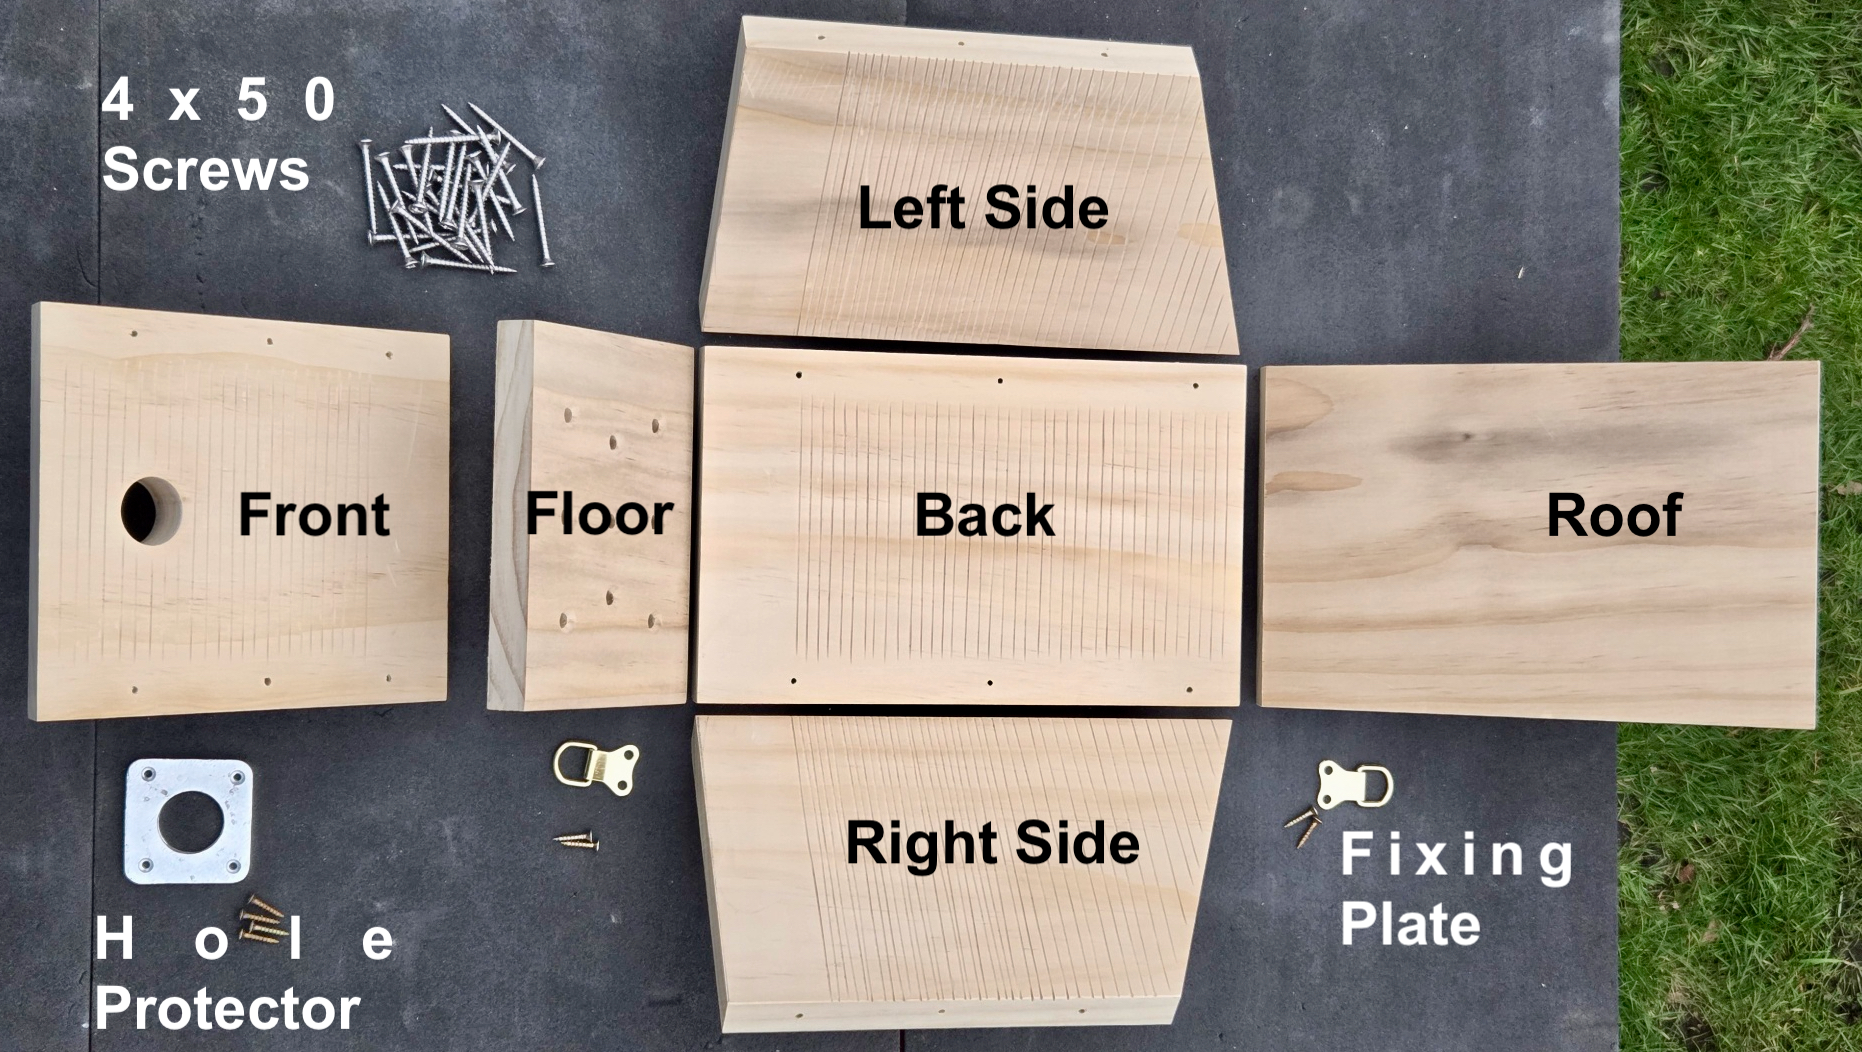
All the parts laid out - sides, back, roof, front, floor, hole protector and fixing plate. - 4
Bevel the back, roof and front at 20°
The back, roof and front share a 20° bevel so the roof slopes and stays weather-tight. Set the mitre saw carefully, then let the blade do the work - don't force it. Check the cut stays straight after the first 2cm.
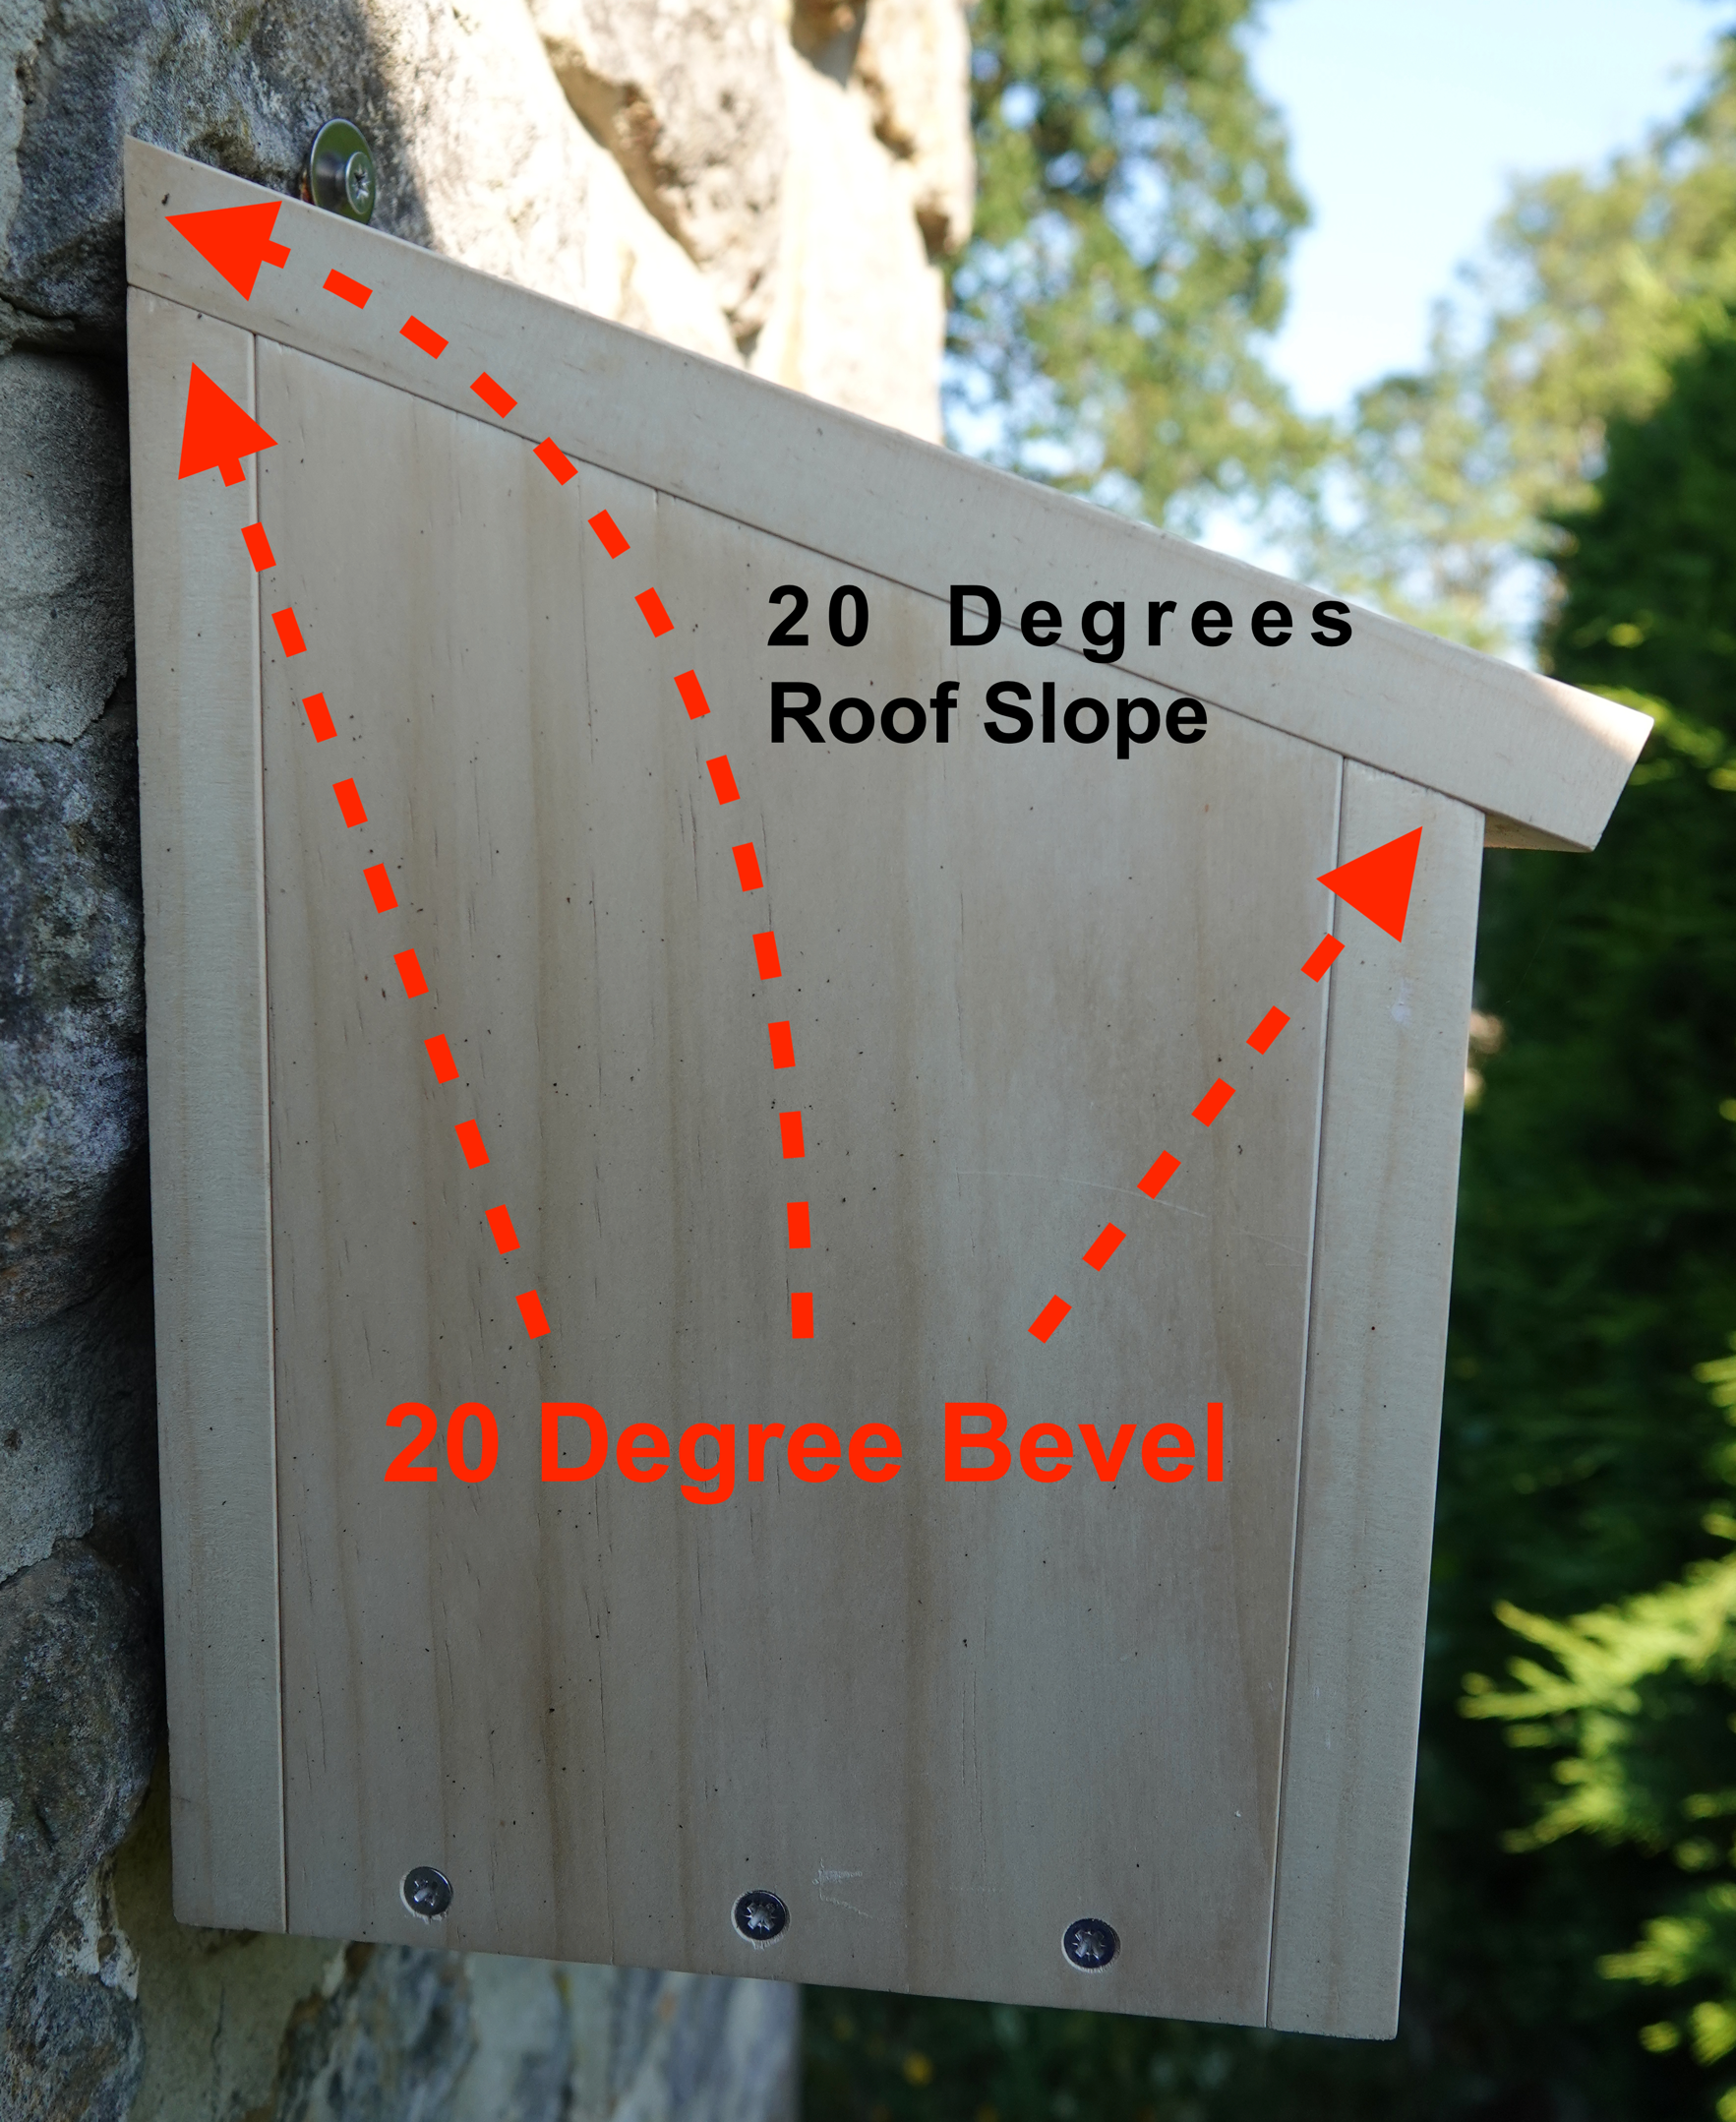
The 20° bevel - the angle on the top of the back, roof and front pieces all match. - 5
Drill the entrance hole
Mark a centre point so the top of the hole sits 30mm below the outside top of the front piece (add 30mm + half the hole diameter). Use a 25mm hole saw for Wrens / Blue Tits / Coal Tits / Marsh Tits, 29mm for Great Tits, 32mm for Sparrows. Put a waste board underneath so the inside cuts clean.
- 6
Score climbing grooves inside
Smooth timber needs scoring so chicks can climb out. Pencil a line 2cm in from each edge on the inside of the front and back, then score shallow horizontal grooves about 1mm deep, 1cm apart, starting 5cm up from the bottom. Sides can be scored edge-to-edge. Rough-sawn softwood doesn't usually need this - the birds grip the grain.
- 7
Cut the floor to fit, then drill drainage
Dry-clamp the sides, back and front first. Stand the assembly on the spare board and pencil round the inside - that's your floor outline. Cut just outside the line so it's a snug push-fit. Then drill 8 or 9 drainage holes (8mm). Keep outer holes 25mm in from the edge so fixing screws miss them.
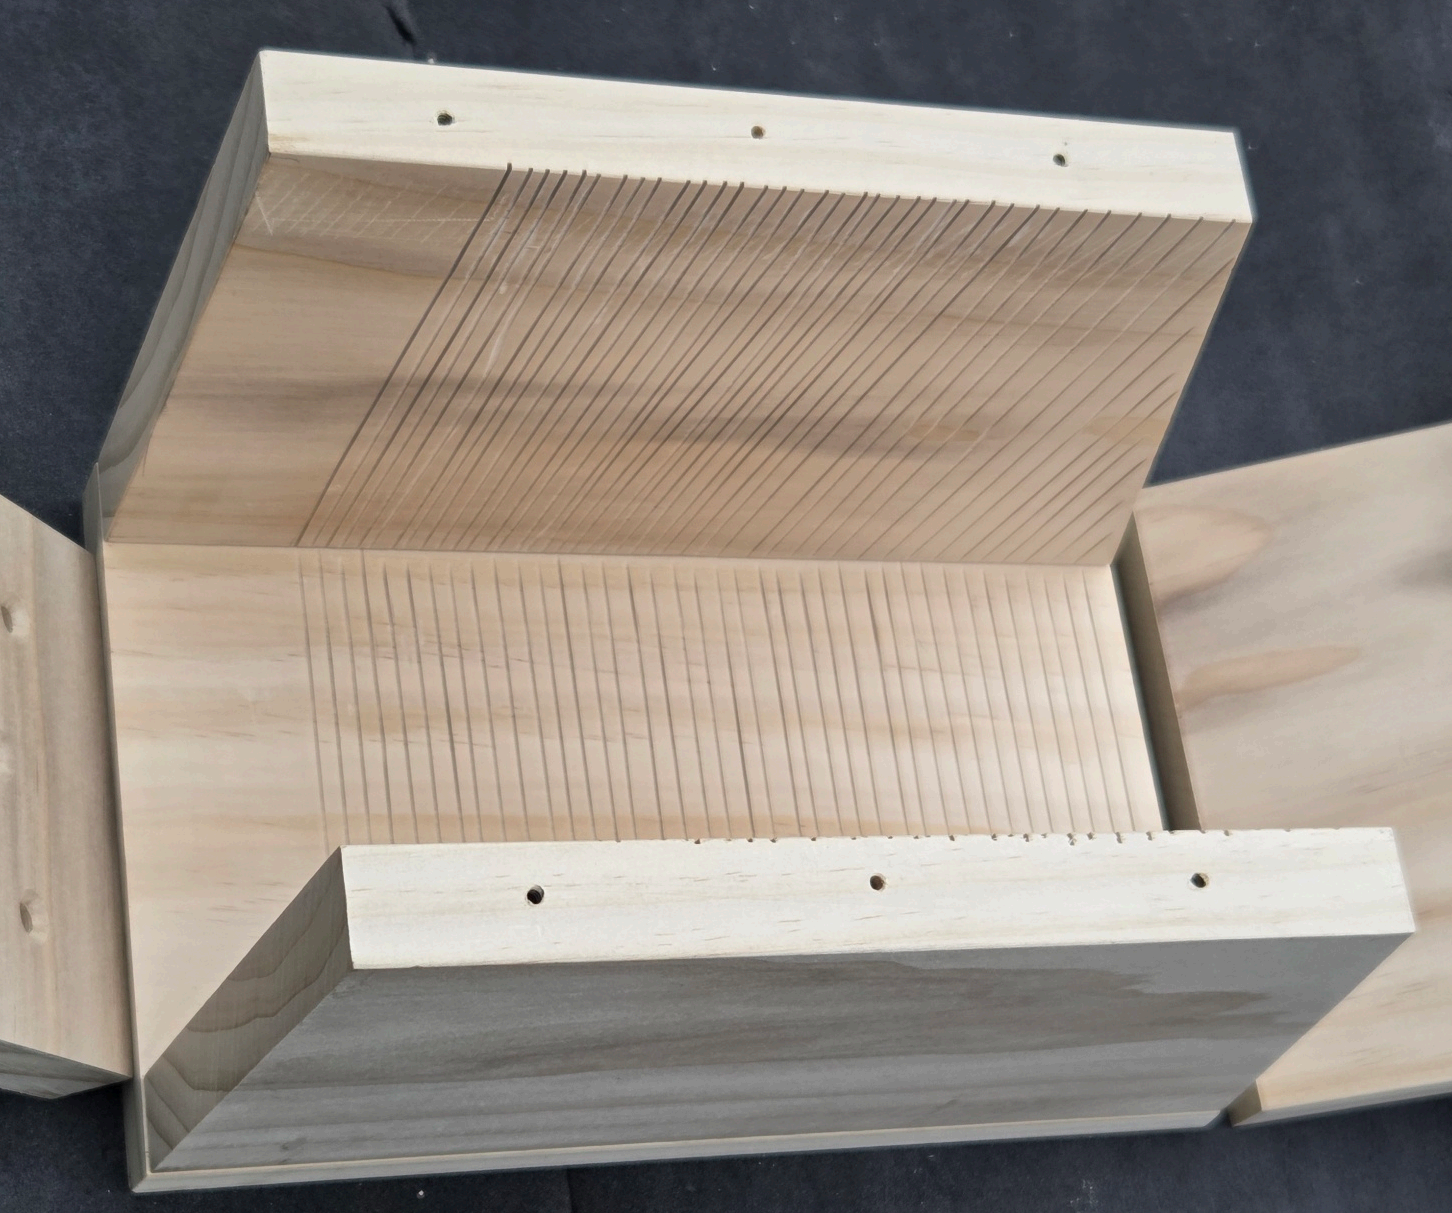
Drainage holes in the floor - 8 or 9 is plenty. - 8
Countersink the screw holes
After drilling pilot holes (3.5mm, 35mm deep, no more than 3 per joint, never closer than 25mm to the end of a piece), countersink them so the screw heads sit flush.
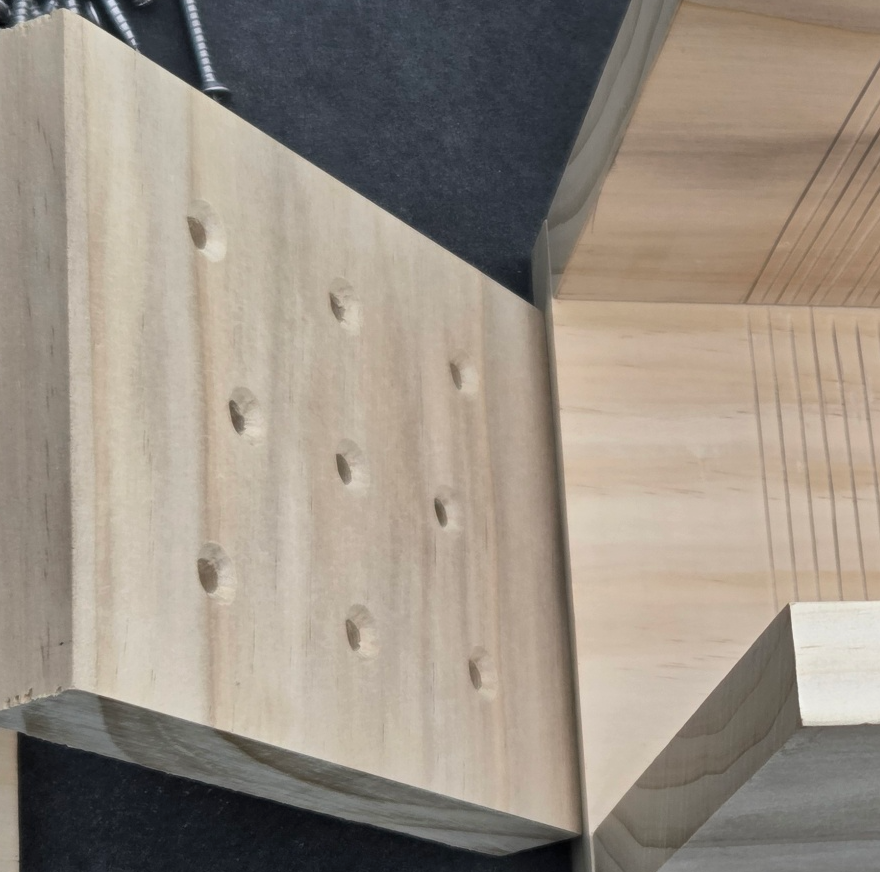
Pilot holes countersunk - clean, splinter-free starts for every screw. - 9
Dry-clamp and check the fit
Clamp the sides between the front and back. Sides fit inside the front and back - flush at every corner. Tap lightly with a small hammer to align. If anything's proud, sand or plane it now, not after assembly.
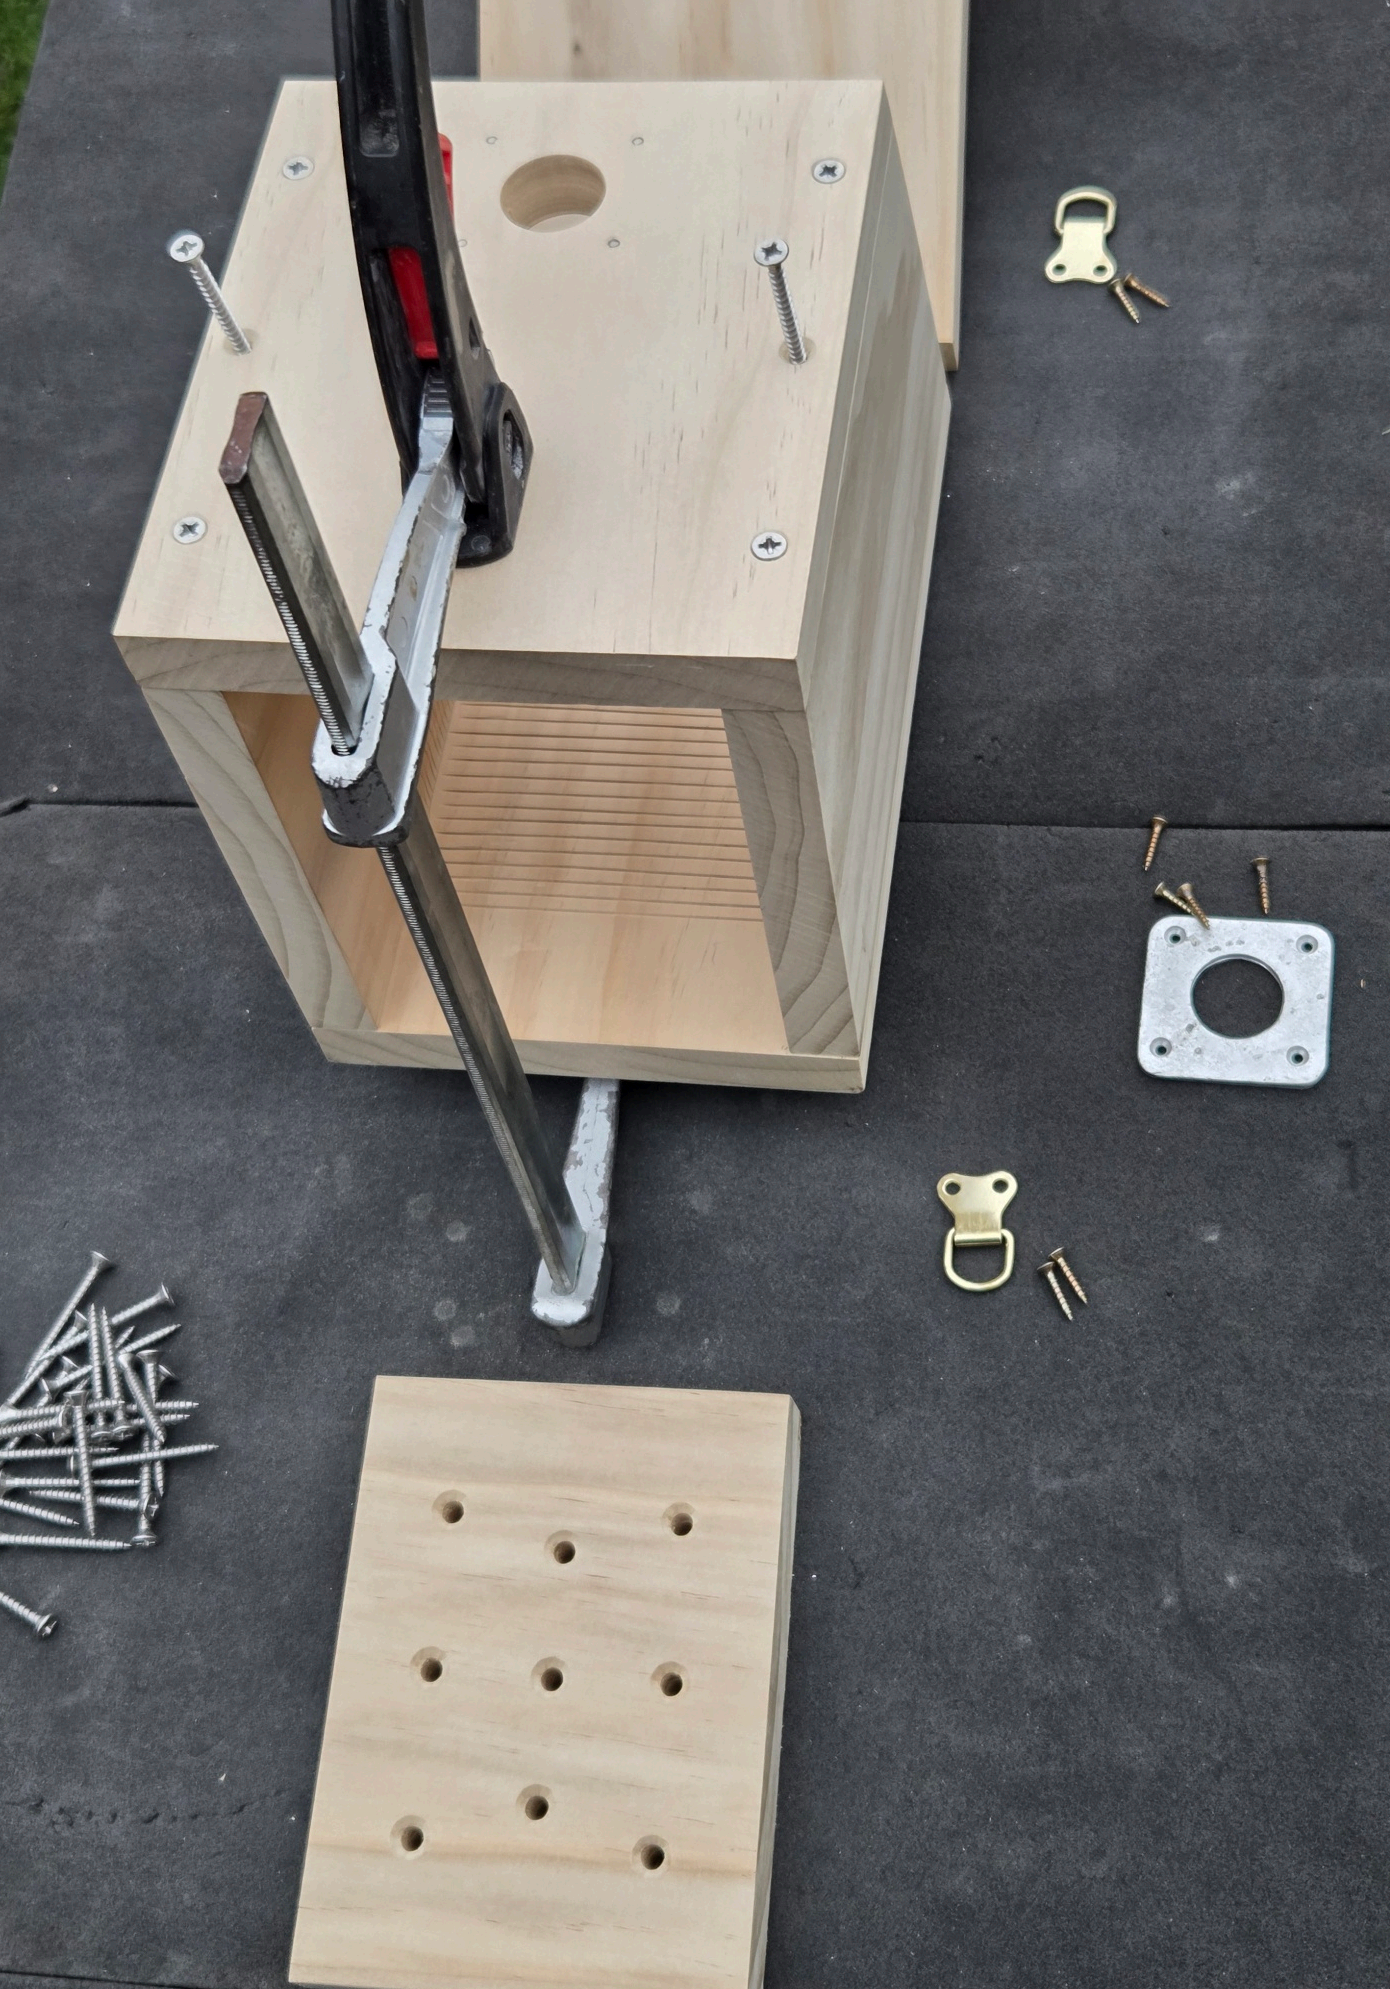
Dry assembly with a single clamp - check every corner sits flush. - 10
Screw it together
Use 5 x 40mm stainless screws (avoid Screwfix - they break). Front, back, sides first - lightly, checking flush. Then floor. Then roof - drill carefully so screws don't burst through the sloping front or back. No glue needed; the screws are plenty strong. Finish the final tightening by hand, not a power drill.
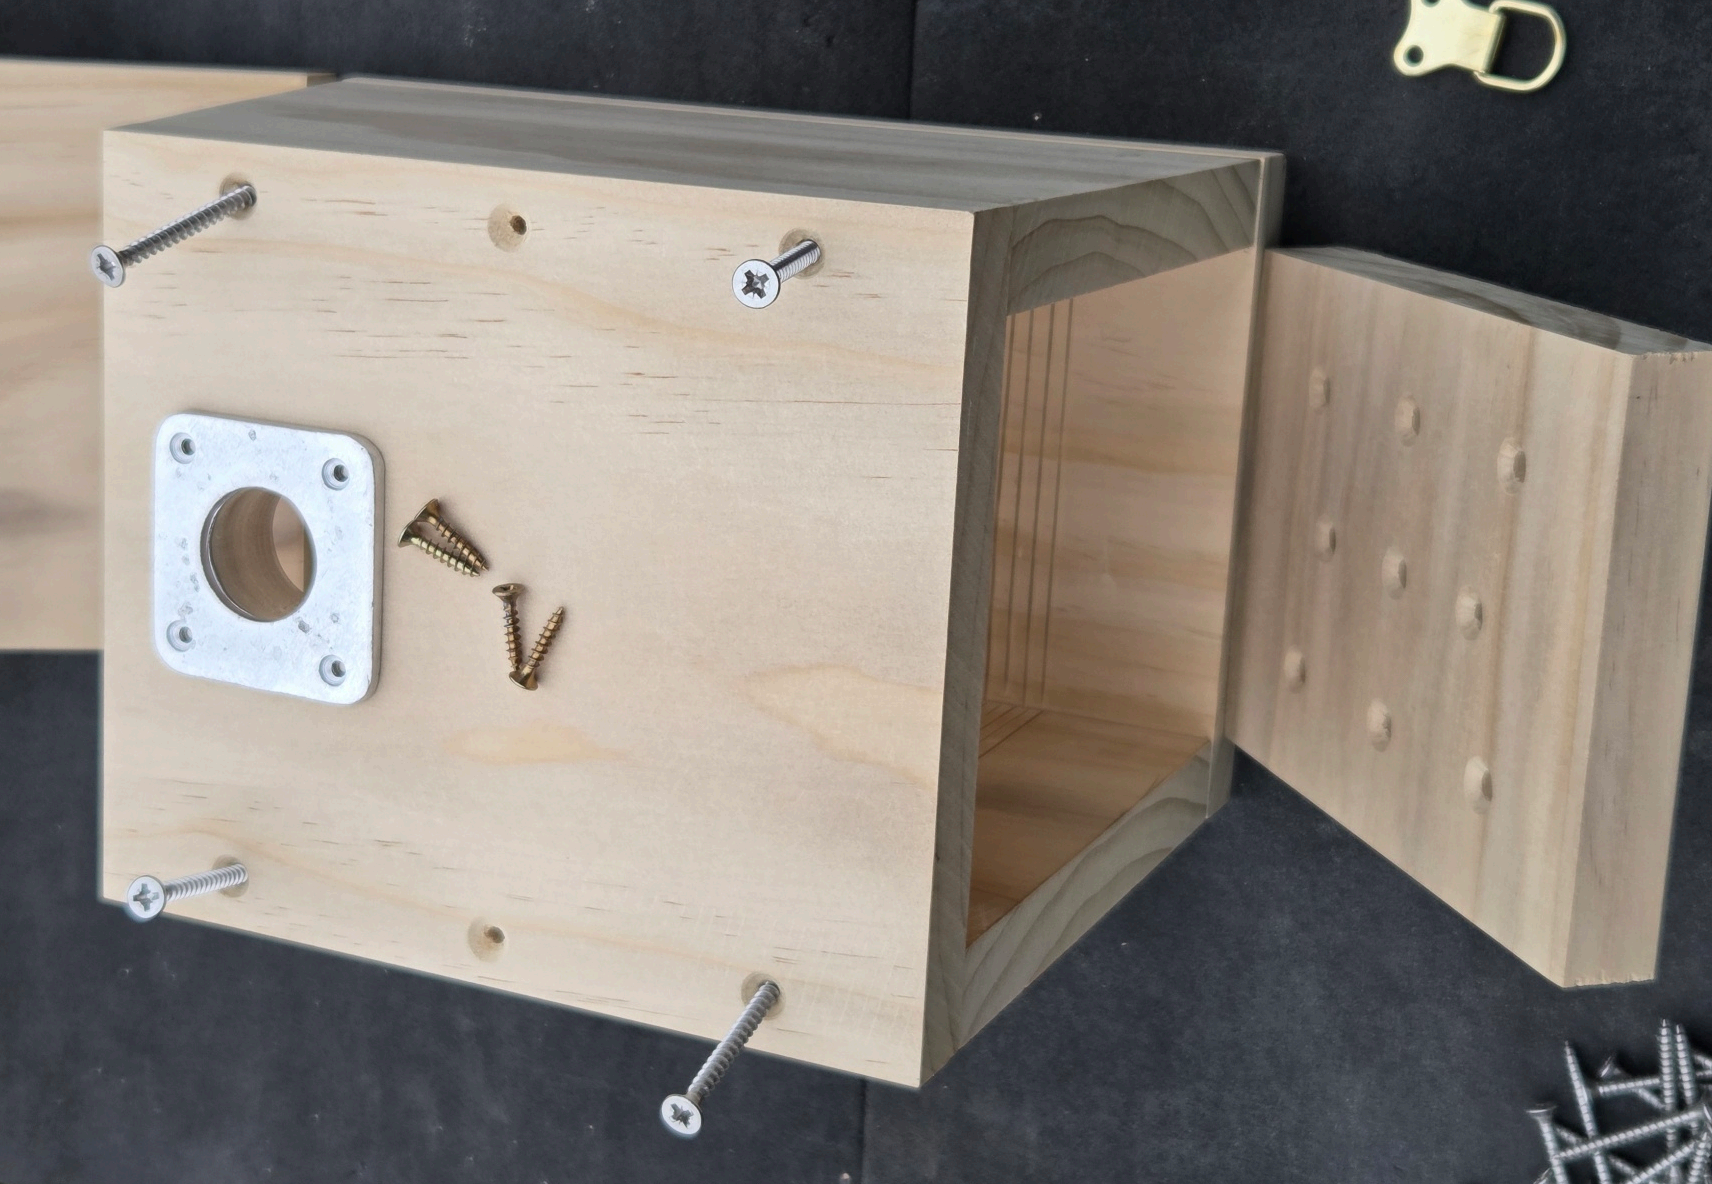
Front, back, sides and floor in place - roof ready to fit. - 11
Fix the roof in the right spots
Because the roof slopes, the back roof-screws need to go in higher than the front. Use the positions marked in green so screws don't burst out of the front or back pieces.
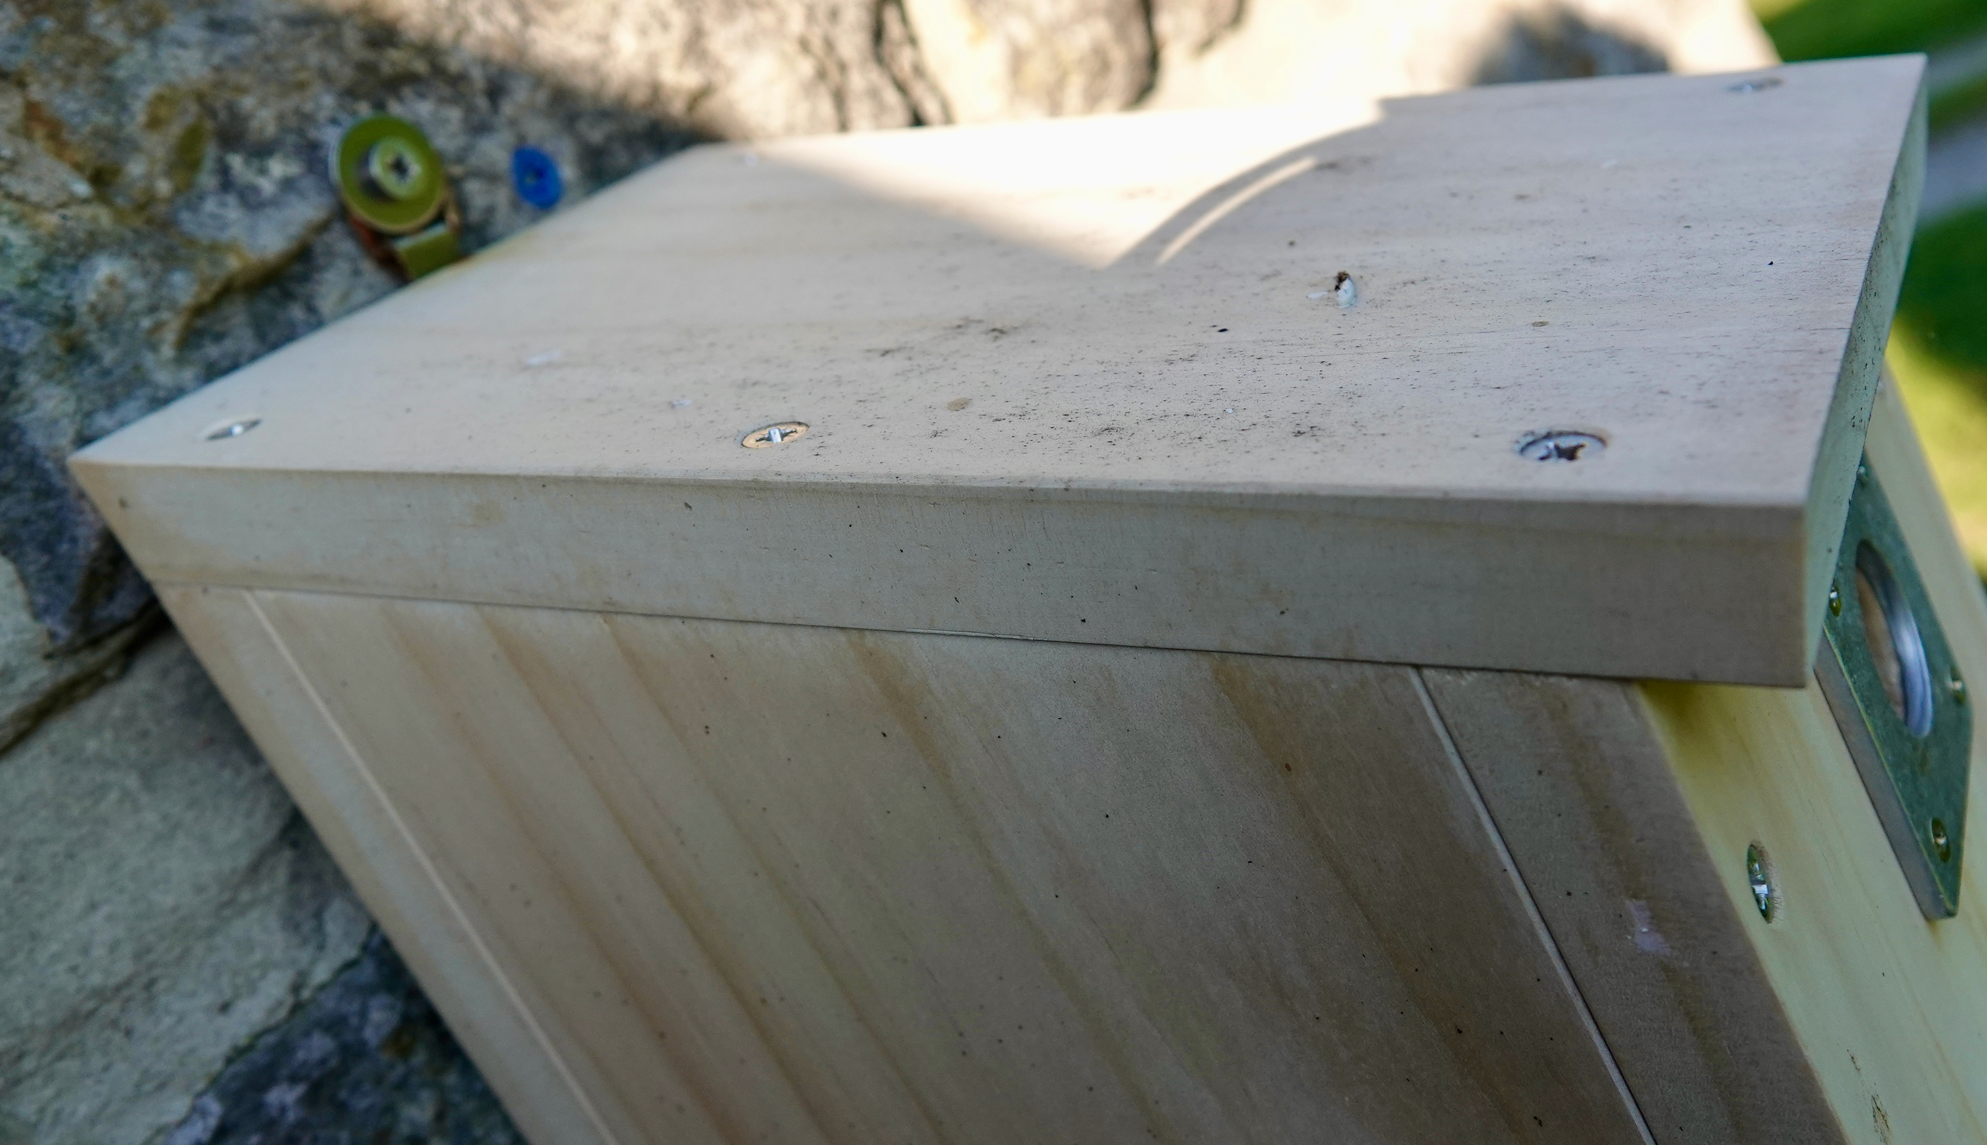
Green arrows show exactly where the roof screws should land. - 12
Fit the hole protector
A metal plate around the entrance stops squirrels and woodpeckers chewing the hole bigger. Match the plate's hole to the hole saw you used. We make ours from scrap aluminium - shop-bought ones are equally good.
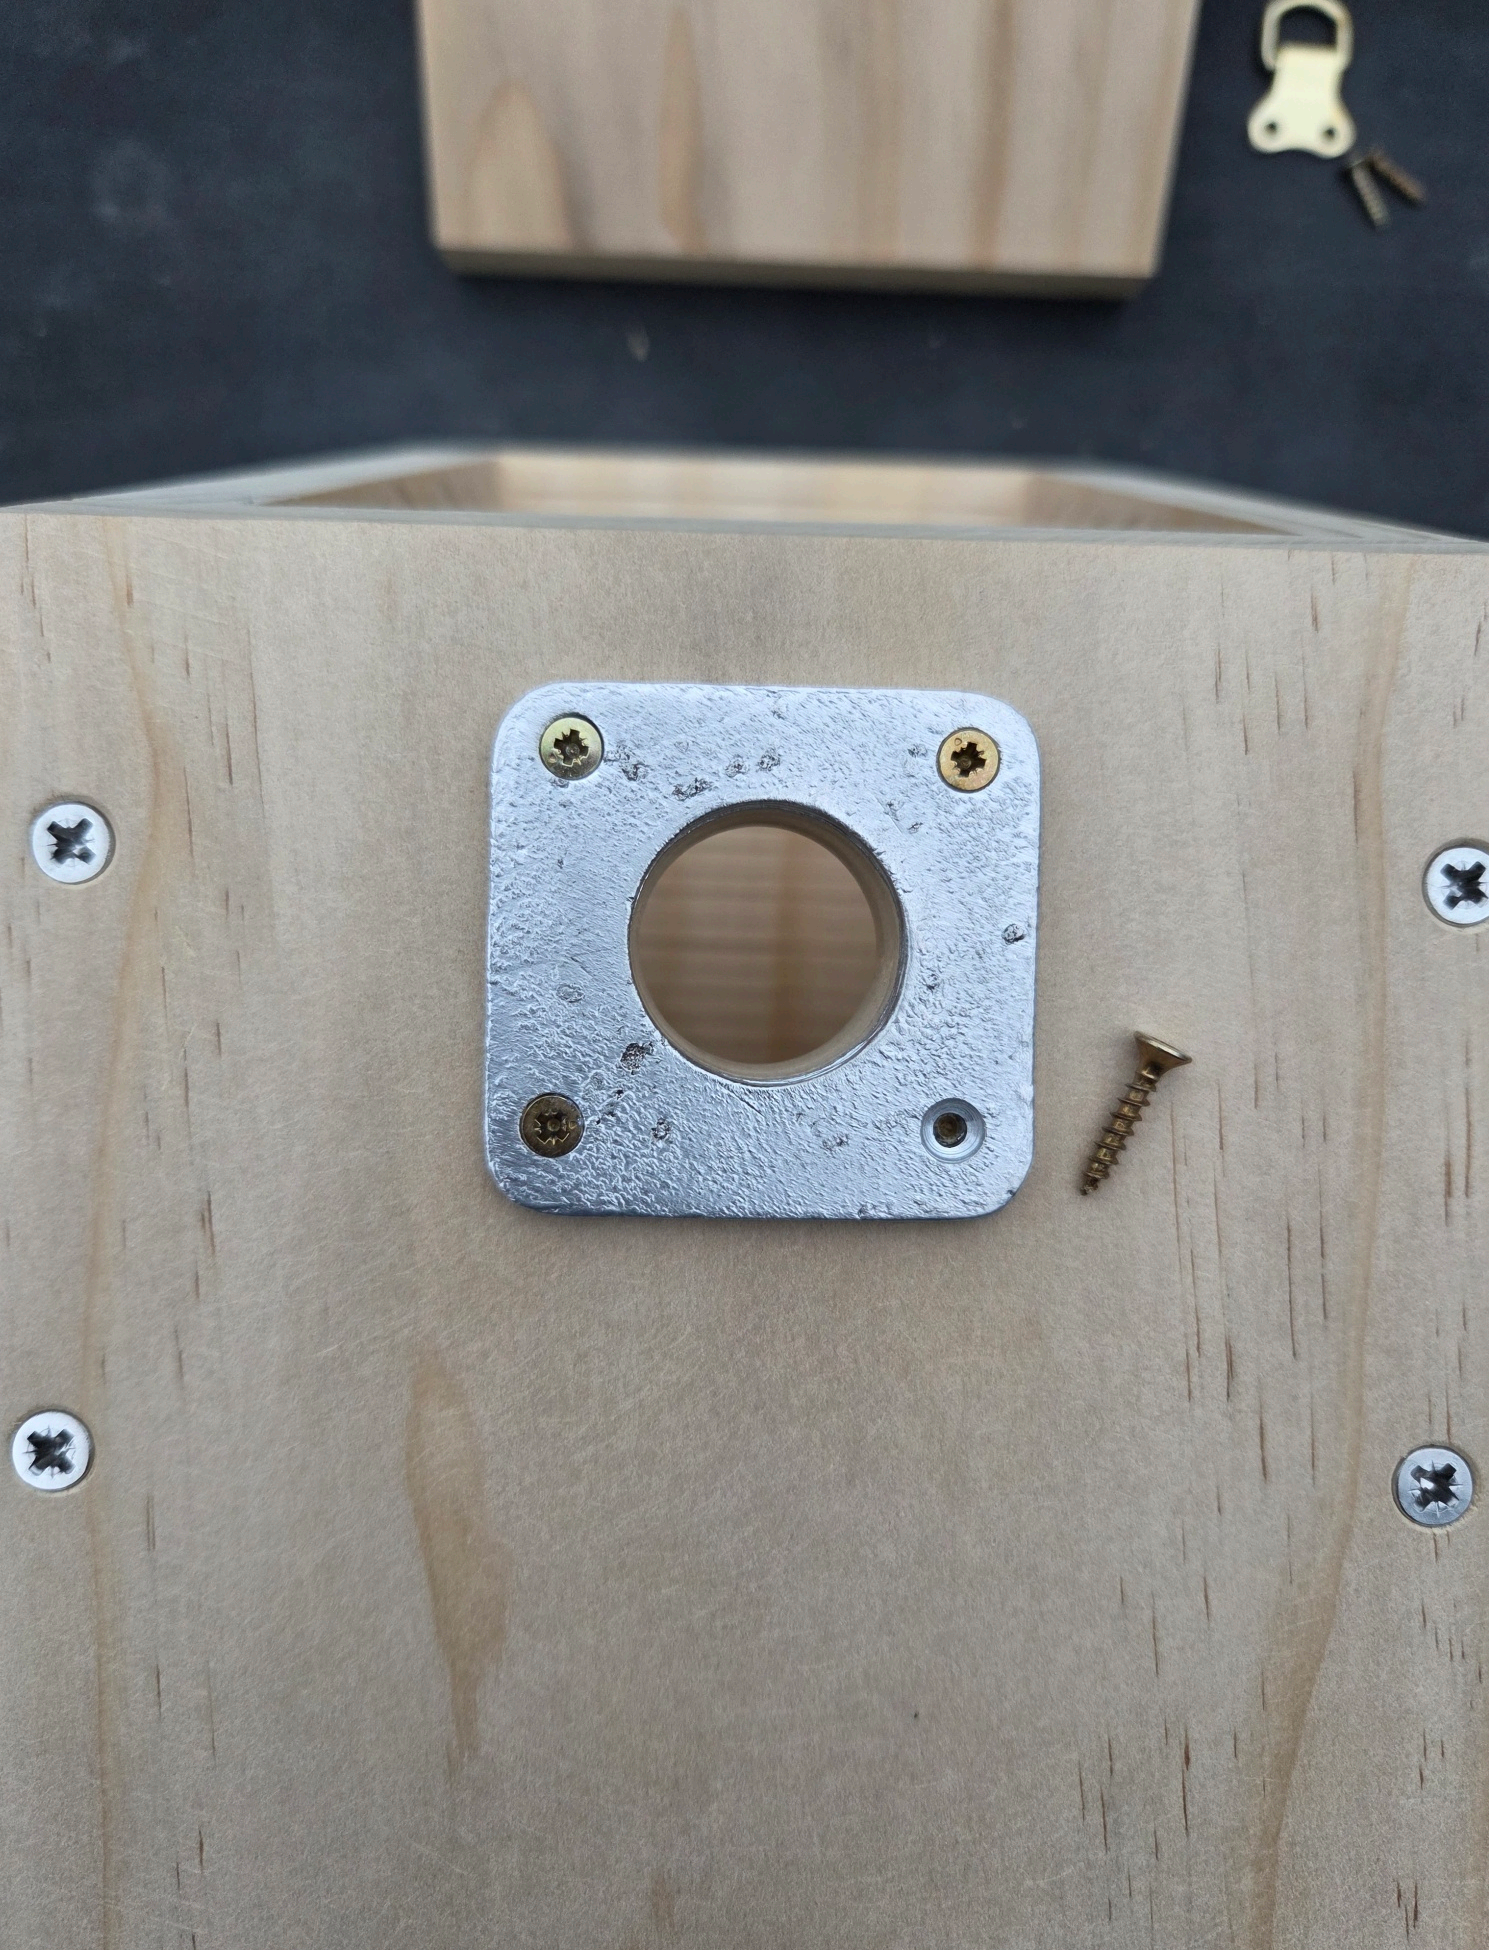
Hole protector fitted flush - no lips for squirrels to gnaw at. - 13
Furnish, fix, and stand back
Drop in a cupped handful of clean wood shavings and a pinch of dried grass - the starter furnishings for your new guests. Fit two heavy-duty hanging eyes (the twin-screw picture-frame type) top and bottom of the back, hang the box in its chosen spot, and congratulate yourself. Be patient - birds will find it, lay, hatch and fledge.
Specialised boxes
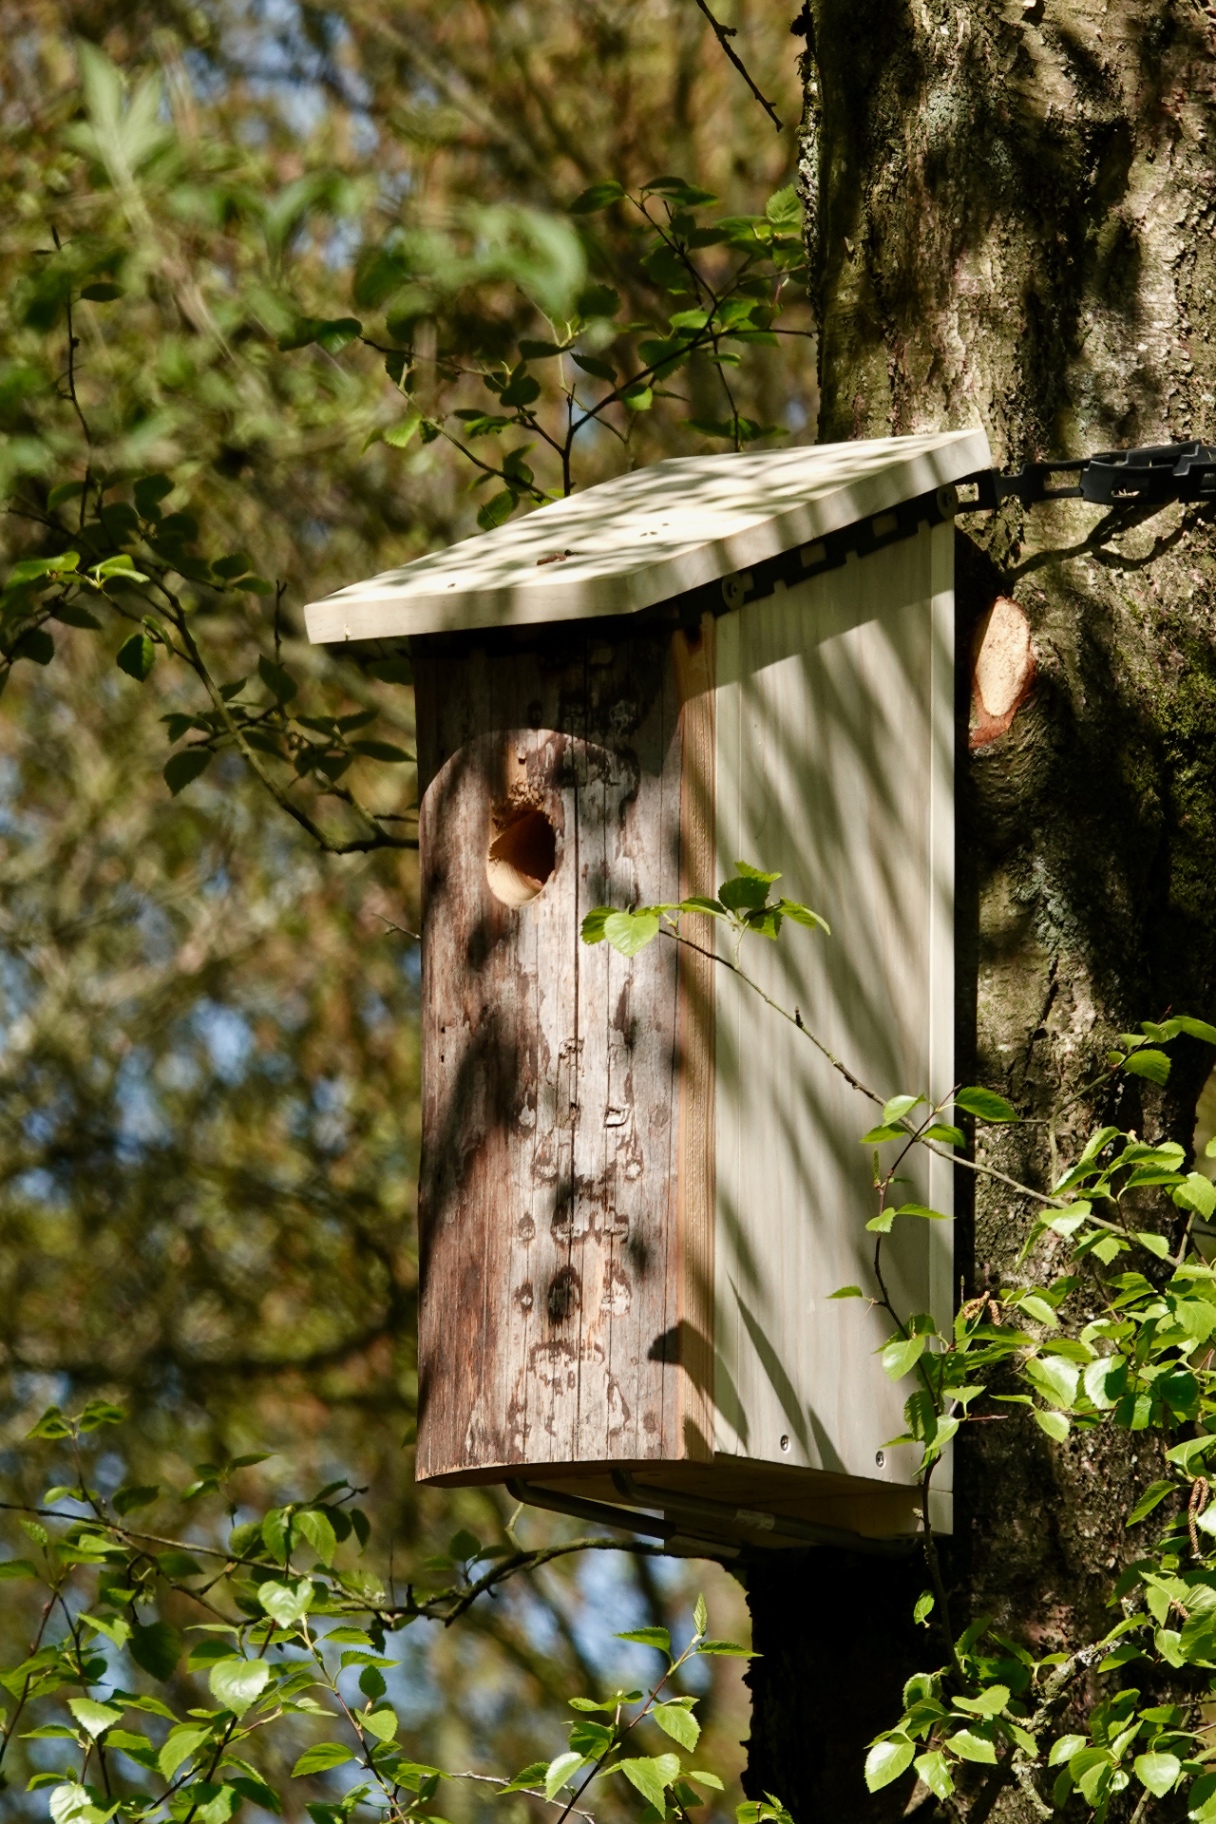
Different species need different boxes. Great Spotted Woodpeckers want a deep cavity with a thick, soft front section they can excavate themselves - so the box is filled with a log or wood-chip plug, not an open hole. Tawny Owls need a tall chimney box high in mature trees. Swifts, House Martins and House Sparrows all benefit from purpose-made boxes fixed under the eaves.
Whatever the species, the rules from the main guide still apply: secure mounting at least 3m up, shaded from the midday sun, sited from north-west round to east, and well away from feeding stations and daily disturbance.
Well Done!
Be patient, and birds will make your nest box their home, lay their eggs, hatch their chicks, and fledge them. Don't forget to tell us your nest box stories, good or bad.